Metadata Administration Tool
This online tool allows for editing the SAML metadata of the participating entities (Identity Provider, Service Provider, Attribute Authorities) and the registration of those entities with the metadata sets published by the DFN-AAI. Each home organization resp. service provider operator is granted access after signing the paperwork with us (see Registration). You can find the metadata administration tool at https://mdv.aai.dfn.de.
This is our Metadata Registration Practice Statement.
Accounts and account settings
How to get access
Metadata admins can be appointed by the contractual or technical contact persons registered in the DFN-AAI contract database. In the metadata administration tool, these persons are listed with the contract data of your organization or company.
If you signed a contract for DFN-AAI with us in one of those roles, you can just send us an e-mail to hotline@aai.dfn.de containing the following information for each person designated as metadata admin:
- first and last name,
- the e-mail address and
- the business telephone number.
The user credentials will then be sent directly to each of the new metadata admins.
Please note that we added a new role called “subadmin” (as of 11/9/2022). Metadata admins can invite subadmins independently and delegate the administration of metadata of individual IdPs/SPs to them. (See below for details.)
How to get your initial credentials for the MD Admin Tool
You will receive an invitation link to the e-mail address you registered with. Follow the link in the e-mail. It only works once, though. If you followed the link earlier but did not set a password, please use the password reset link.
Two factor authentication
Configuring a second factor for login is mandatory. Right after your initial login you are asked to register a TOTP device.
- You can either use a TOTP app on your smartphone, or a password manager that supports TOTP.
- Step 1: Enter a name for the device you want to register, e.g. “phone”. This is a description for you to distinguish between several configured factors. Click “Add new 2FA device”.
- If you are using an authenticator app on a phone, scan the QR code and confirm the device by entering a code the app generates.
- If you are using a different application, e.g. a password manager, you can use the link underneath the QR code. Please consider that a password manager containing both the first and the second factor may be less secure.
- Step 2: Generate emergency codes.
- You should generate a set of emergency codes just in case you lose your second factor. Each of them can be used once as the second factor for a login. Keep the emergency codes in a safe place.
- If your emergency codes are lost or compromised you can invalidate them here.
- You can return to your 2FA configuration later by choosing “2FA” in the menu underneath your e-mail address in the top right corner.
How to configure 2FA upon second login
If you logged out after your initial login without adding a second factor, you can ONCE request a token via e-mail. To do so, go to the login page, enter your user name (which is your e-mail address) and your password and press submit. If this is you first attempt to do this, the tool will offer you to send you a token. Once you have got it and logged in with it, please register your second factor immediately as this procedure will not work again.
Password changes
- Expand the menu underneath your user name in the top right corner and select “Change Password”.
- Enter your old password once for confirmation. Enter your new password twice. Note the list of possible characters in a password.
- Save the new password.
Further role: Subadmin
In the new metadata administration tool the role of subadmins is a new feature. It enables regular metadata admins to delegate the administration of metadata of individual IdPs/SPs to third parties. They do not have to involve DFN-AAI hotline into account creation for subadmins. (Regular metadata admins with full access still have to be registered via the hotline though.)
Subadmins have limited permissions. They can
- see the overview containing the information about your organization including the contact persons,
- view the metadata of all IdPs/SPs you have entered,
- edit the metadata of systems delegated to them,
- view the version history of systems delegated to them,
- upload logos and favicons.
Subadmins cannot:
- edit the details about your organization,
- add new IdPs/SPs
- delete the entire metadata of an entity,
- edit scopes.
Invitation of subadmins
- Go to the overview of your organization (the page that you see after login).
- Expand the “Users” section and click “Invite Subadmin”.
- Enter the e-mail address of the person you would like to invite and click “Invite user and manage permissions”.
- In the next step, add some information about the new subadmin. The e-mail address, the first name, the last name and the phone number are required fields.
- In the section “Permissions” there is a list of all your IdPs and SPs. You can grant the subadmin write access to individual entities. The subadmin will not be able to edit the other ones.
- Subadmins cannot add new entities! Please add the entity a subadmin shall be responsible for yourself, then delegate it.
- Save your changes.
- You are redirected to overview. In the users list you can now see the newly added account. On the right side you have buttons to edit or delete the subadmin's account.


Your organization's overview
After logging in you are presented an overview of everything linked to your organization. If you are a metadata admin for more than one organization, you see the list of organizations as your start page.
The overview of an organization contains the following sections that are all collapsed when you open the page:
- Certificate expiration warnings: If any of your systems only has a certificate that will expire within the next 30 days or that has already expired, the first thing you see is a red section. Expand it to jump directly to the affected entity.
- Information on the institution: Here you edit the display name and the information URL of your organization. The information is automatically added to the
<Organization>element of your metadata. Click into the lines for German and/or English to edit them. - Contracts:
- In this section you can find all information concerning your DFN-AAI contract resp. your SP Agreement. Please check if everything is up-to-date from time to time and let your hotline know about any changes! The contact persons who signed the contract are especially important as they are the only ones entitled to name metadata admins with full access to the account. (Subadmins, however, can also be invited by regular metadata admins.)
- Local Metadata: This section contains a list of all entities that have been added to the local metadata we generate for your organization. You can also find the download URL as well as a possibility to limit access to the download URL.
- Users: Here you can find the list of all metadata admins that have access to this organization's data. We distinguish between regular metadata admins with full access to the organization and subadmins with write access to selected entities. Regular metadata admins can invite subadmins here.
- Entities: Here you can access the Identity Providers, Service Providers and/or Attribute Authorities of your organization.
- Entity Lists: If you see this section, your organization manages an Entity Category. Here you can control which entities are part of it.
- Logos and Scopes: Here you upload all logos and favicons, as well as the scopes you need across all your entities. When editing an individual entity you assign logos, favicons and a scope from this pool. Newly added scopes must be approved by the DFN-AAI Team.
The list of entities
Expand the section “Entities” in your organization's overview. Here you can access the metadata entries of your IdPs, SPs or Attribute Authorities. Regular metadata admins have five action buttons on the right side of the list:
- edit the entity
- view the metadata of the entity (xml in browser)
- download the metadata of the entity
- delete the entity
- view the version history of the entity.

How to add an IdP/SP
- Go to the overview of your organization and expand the section “Entities”. Click “Identity Provider” or “Service Provider”.
- You then see the list o existing entities (if there are any).
- On top of the list, there are two buttons:
- “Create Entity from existing metadata”:
- Copy the xml metadata of your IdP resp. SP into the text field and click “Upload metadata”.
- The new metadata entry has now been added.
- Check the form, adapt the information if needed and click “Review changes”.
- “Create new Identity Provider” resp. “Create new Service Provider”:
- Here you get an empty form where you have to enter all information yourself.
How to edit an IdP/SP
- Go to the overview of your organization and expand the section “Entities”. Click “Identity Provider” or “Service Provider”.
- In the list of your IdPs/SPs the first action button (on the right side) takes you to edit mode.
- Each section of the edit form contains a short help text. You can also find the help texts on-wiki in our checklist.
- To save an edit click “Review changes” at the bottom. Check the diff between the old and the new version and submit or correct your changes.
Logos and favicons
- For security reasons the new metadata administration tool no longer fetches (new) logos from the internet. All new logos must be uploaded to the tool which then delivers the files.
- You can find the section “Logos and Scopes” at the bottom of the overview. Expand it and select “Logos & Favicons”.
- On the next screen choose betweens the two tabs “Logos” and “Favicons”.
- Each tab shows you the logos / favicons that were already uploaded. You can also see in which metadata entries they are used.
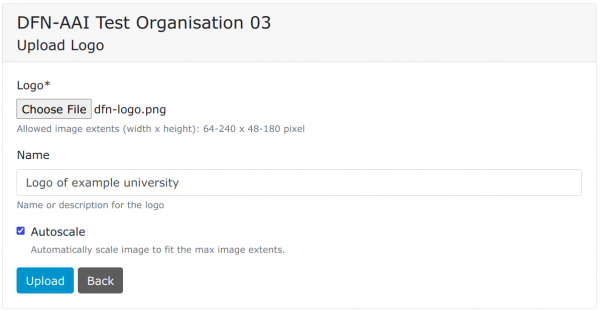
- Click “Upload New Logo” resp. “Upload New Favicon” at the bottom.
- Select a file from your local computer and choose a meaningful name for the list.
- If your file does not comply with the image size that can be displayed in the common UI interfaces, you can let our server scale it for you by ticking “Autoscale”. The metadata administration tool does not accept any logos or favicons that are too big or too small. Thus, if you do not enable autoscaling you have to make sure the images have the correct size.